Generators are very useful if you live in a place where a lot of outages occur, but they are also useful for a lot of other applications like camping, or for generating power for construction sites, etc.
The one issue they have is that they tend to be VERY loud, especially the powerful ones.
Buying a soundproof box for your generator is a very effective way to drastically lower the noise it makes; however, these boxes are extremely expensive, some of them even reaching the $2000 mark.
Your best bet would be to build one yourself.
In this article you will learn not only how to create one of these boxes yourself, but also a couple of other things you can do in order to further lower the noise the generator makes.
Table of Contents
How to soundproof a generator
Of course, I already mentioned the box method, but you should first try anti vibration pads.
Placing the generator on top of these pads can help reduce the noise it makes by quite a bit.
Try this method and see what improvements you get, if you feel like you need to deaden the sound a lot more, then you can definitely build the box and use the vibration pads under the generator, inside the box, as well.
This will help with reducing the vibrations transmitted to the box, which would otherwise resonate, causing more noise.
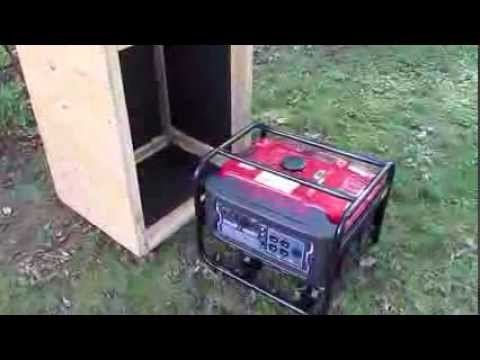
Build a soundproof generator box
To do this you are going to need a couple of materials, some of which you probably have laying around in your garage.
You will need Medium Density Fiberboard or anything similar. The thicker the better.
Also make sure to get Mass Loaded Vinyl since this would be the material responsible for sound absorption.
Mass Loaded Vinyl is more commonly used to soundproof a car, but it can work for any soundproofing applications.
Purchase some Acoustic Caulk. This will allow you to seal all the little cracks and gaps properly.
Anti-vibration Pads or anti-vibration mats are a must as well.
Also make sure to purchase some screws, nails, L-brackets and a table saw or circular saw.
Note: There are two types of boxes you can build, the simple version or the three-layered version.
Simple Soundproof Generator Box
This one will only consist of one layer of fiberboard with the mass loaded vinyl glued to its interior.
Step 1: Take measurements
The first thing you need to do is to measure your generator to absolutely make sure that you build a box with enough room for it.
Making it too big won’t be an issue, just make sure it’s not too small.
Once you have taken the correct measures, write them down.
Note: Add a couple of inches on all sides in order to leave room for the insulation materials.
Step 2: Cutting the Box
The one helpful tip I can give you here is to use a pencil on the fiberboard to trace exactly where you are going to cut, you don’t want to make mistakes here.
Now all you have to do is cut the fiberboard using a saw.
Step 3: Screw the pieces of fiberboard together
This step is fairly straight forward since all you need to do is put every piece of fiberboard that you cut where it belongs and using the L-brackets and the screws, you now just need to put the pieces together.
Adding a bit of glue to the joints will create a better seal.
Step 4: Ventilation Holes
Once you are done cutting the box, you’re going to need to make some holes for ventilation.
These are essential for the generator to work, otherwise it can overheat.
Another reason for adding ventilation holes is that the generator needs air to function properly, which means that if there aren’t any, the exhaust fumes will fill the box and kill the engine.
Where should the ventilation holes be?
The first hole should be on the side wall and the other one on the top of the box. It’s best if you put it a bitt off to the side instead of making it dead-center.
You could install some ventilation ducts or simply leave the holes open. Another way is to install a fan inside the box and to connect it directly to the generator.
This will create a lot of airflow which will prevent the generator from overheating, plus once the generator starts, then so will the fan which means that you don’t need to worry about it.
Step 5: Mass Loaded Vinyl
Next you need to cut some pieces of mass loaded vinyl and glue them to the internal surfaces of the box using acoustic caulk. Try and cover as much of the fiberboard as possible.
If possible, don’t cut little pieces of the vinyl since there will be some gaps left open between each of the pieces, and even if you seal them with acoustic caulk, one big piece that covers the entirety of one wall will be much more effective.
Step 6: Apply Acoustic Caulk
I’ve already touched a bit on this, but you should definitely apply acoustic caulk along the fiberboard joints in order so fully seal the box.
It doesn’t need to look pretty, just get it in there as best you can.
Step 7: Install the foam Mat
Installing a foam mat or an anti-vibration mat on the bottom of the box is very advisable since it will absorb the vibrations that would otherwise resonate across the whole box.
Step 8: See the results
Put the generator inside the box, start it and then close the box.
You should notice a big improvement.
This is it, for the simple version of the box. It should provide you with sufficient insulation to be able to use the generator without driving everyone around you crazy.
However, there is another box you could make that will be more effective.
Three-layered soundproof generator box

Sound prefers to travel in a straight line, if you make a box that will force the sound to bounce around it before being able to exit, then the amount of noise that ends up leaving the box should be much lower.
Air can easily flow through such a box, which means that keeping the generator cool won’t be an issue.
Step 1: Taking Measurements
Measure the height, depth and width of your generator and make sure to write down the measurements.
Make the box slightly bigger in order to leave some room for the sound absorbing materials which will be installed later.
This box will consist of three different parts;
Part A will have two side walls and a ceiling, it should be a bit higher than the generator for adequate ventilation.
Cut the top panel to the width and depth that you measured.
Part B will have two sidewalls, a ceiling and a back wall. This one should be three inches higher and wider than part A.
Part C will have two side walls, a ceiling and a front wall. This one will, again, be three inches higher and wider than the previous part (part B).
Step 2: Building the Box
Cut the pieces of fiberboard to these specific dimensions and glue the pieces of fiberboard corresponding to each part (A, B and C) together. Lastly screw the parts together to give them a tighter seal.
Note: You may notice I didn’t mention anything about a bottom piece that you should cut.
This is because since this box is made out of so many parts, if you put them on another piece of fiberboard then the vibrations that the generator creates will make the whole structure shake and rattle.
This box should be placed on top of an anti-vibration mat.
Step 3: Add Mass Loaded Vinyl
You should put mass loaded vinyl on the interior AND exterior of parts A and B of the box, but only on the interior of part C.
Cut the pieces of the vinyl, if possible, to the exact size of the fiberboard that you will be gluing it to.
Use the acoustic caulk to do this.
Step 4: Apply Acoustic Caulk
You should apply acoustic caulk along the joints of the fiberboard and anywhere else where you feel like there’s a gap or crack left unsealed.
Step 5: Get an anti-vibration mat
An anti-vibration mat will help both with absorbing sound and also the vibrations generated by the generator.
Step 6: Final Assembly
Now all that’s left for you to do is to put the Part A of the box over the generator, next add the Part B and lastly Part C.
Everything should fit perfectly forming a tight seal while still leaving room on top for the air to flow.
If you don’t get a snug fit, then you might want to consider adding some more vinyl to the sides until it forms an air-tight seal.
Now, here are some extra tips to further help lower your generator’s noise…
Replace the muffler
The exhaust pipes are one of the loudest parts of a generator, but the great thing about this is that they can be replaced.
Getting a bigger muffler will help, since it’s designed to muffle the sound a lot better.
This works in a similar way to how a car muffler works, if you take it out your car will sound way too loud.
Turn the exhaust pipes vertically
Now this might make you raise your eyebrows, but it can actually help quite a bit.
Like I just mentioned, aside from the motor, the exhaust pipes are the loudest part of a generator and they are normally parallel to the ground, which means that they will not only be blowing the air horizontally, but the noise also.
Turning the pipes upward can help quite a bit since the generator will now push the sounds up, instead of horizontally and parallel to the floor.
Use Water
This one might be a bit weird to you but connecting a hose to the exhaust pipes and sending that hose to a big bucket full of water can help with reducing the noise.
I put this method on the list because of its sheer simplicity. You don’t need to purchase any new equipment, unless you don’t have a hose, or build anything.
Get a quieter Generator
If you don’t want to go through all the hassle of building a box and trying all these different methods, then you could invest in a quieter modern generator.
If you just need a small one for emergencies, then I’d recommend the Dirty Hand Tools 800W Inverter Generator.
This is a very affordable one that should be enough for some short usage.
If you want a more powerful one, then you should go with the Ryobi Bluetooth, which is also very quiet.
This one is parallel capable, which means that if you need more power you can link two Ryobi generators together.
You might be interested in reading about the Quietest Generators Available.
Conclusion
No matter how quiet a generator you purchase, they will always be louder than what you’d like.
Follow all the steps in this guide and hopefully you will be able to lower the noise to a manageable level.
If you found this information helpful, then please consider sharing!
Thanks for stopping by!
Last Updated on August 9, 2019 by Facundo