When it comes to soundproofing windows, it’s a fairly simple process since you mostly need to use a weatherstrip to seal the gaps between the frame and the window itself, and that’s it.
However, with sliding windows it gets a bit more complicated since they move, and this can create a whole new array of problems, like ripping out the weatherstripp.
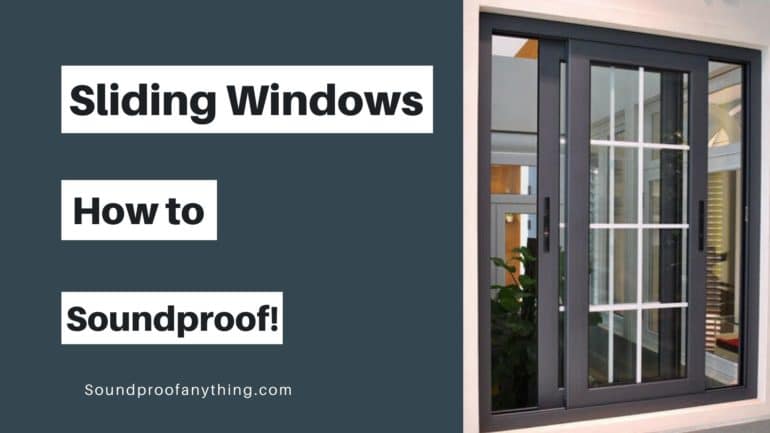
In this article, we’ll be taking a closer look at how to properly soundproof sliding windows as cheaply as possible!
But before we get started, there’s two concepts that you need to get right, since most people tend to think that they are the same thing.
Table of Contents
Soundproofing vs Sound Absorption
Soundproofing is the process of isolating or blocking the sound, not allowing it to enter or to leave a room.
To do this you will need to use materials that are designed to not let sound through, like drywall.
Sound Absorption relies on materials that are good at absorbing sound, such as acoustic panels, acoustic blankets, etc. to reduce the echo inside of a room.
Sound absorption, while not being great at soundproofing, will still help with it, which is why you might want to use it in conjunction with sound-blocking materials to achieve the best results.
Now that that’s out of the way, let’s answer the question, shall we?
Now that that’s out of the way, let’s get started!
How to Soundproof Sliding Windows
Note: I will be covering the windows that slide sideways as well as the ones that slide up and down, which is why I will first discuss one general rule that you should follow no matter the window type, and then I’ll move on to the specifics of each type of sliding window.
Check for Unsealed Gaps on the inner & outer side of the window
The most important step is to check if there is damage, like any sort of gap or crack, that may have formed around the frame of the window over time since this will let both sound and heat/cold into your home.
Unless you solve this, there is little to no point in going any further since sound will be able to get in through those cracks with ease.
Luckily, solving this issue is extremely simple since all you need is Caulk and a Caulk Gun, which you can buy for roughly $30.
Next, all you need to do is apply Caulk on every small crack to seal it up, both on the interior and exterior of the house making sure that no crack goes unsealed.
Of course, in most scenarios this won’t be necessary since it tends to mostly happen in old homes, but make sure to check thoroughly to see if it’s a necessary step you should be taking.
Now that that’s out of the way, let’s get into the specifics!
How to Soundproof Sideways Sliding Windows
Assuming no caulking is needed, you can now move on to the next and most effective part of this whole process, which is weatherstripping.
Apply a Pile Weatherstrip

In the case of sliding windows, it’s not as easy as simply installing a regular foam weatherstrip since opening or closing the window might rip it out.
On the other hand, if the weatherstrip isn’t thick enough and it doesn’t create a seal between the window and the frame, it serves no purpose.
So, how do we deal with this?
The easiest way to deal with this is to use a Pile weatherstrip like this one, since the bristles will bend once you close the window, and this will completely negate the risk of it being torn out.
How to install a Pile Weatherstrip?
If you get the weatherstrip I linked earlier, then you shouldn’t have any problems installing it since it comes with an adhesive backing which should make the installation process a breeze.
However, make sure to measure how much space you have to work with between the frame and the window itself and purchase the weatherstrip accordingly.
Installation Steps:
- Measure the both the sides as well as the top/bottom of the frame where the weatherstrip will be attached.
- Sliding windows can usually be taken out of the frame quite easily, so do that to make the installation go smoother.
- Use rubbing alcohol to clean the inner wall of the frame (the inner wall would
- On the bottom, adhere the weatherstrip to the inner side of the frame and then move on to the sides and the top.
- Reinstall the window panels.
It’s worth noting that on some windows there may not be enough space to install this kind of weatherstrip, and in that case I’d actually recommend using v-seal weatherstripping.
Not only will installing a weatherstrip help with reducing unwanted noises, but it will also prevent the cold from getting in during the winter and the heat during the summer, hence reducing the overall temperature loss inside the house itself, and therefore lowering your electricity bill.
If you managed to do this correctly, you should be able to notice a dramatic reduction in noise and this, at least in most cases, may already be enough.
However, here are a couple other steps you can take if you still need better soundproofing.
Install a Window Insert

Window inserts are essentially storm windows designed to be installed on the inner side of the window and not the outer side, like most storm windows.
These generally need to be custom made to the size of your window and the way they work is by you pressing them into the frame, and these inserts will create a tight seal around the entire window which won’t let sound through.
This alternative may be a bit more expensive, but it really does work! Plus, window inserts can easily be installed and removed again, which makes them quite versatile.
Indow Windows is one of the companies that manufacture these inserts, but there are plenty of others.
Install a Soundproof Window Panel

No, I’m not talking about foam acoustic panels or even rockwool panels, the types of panels I’m refering to are custom barriers that come with both sound blocking and sound absorbing materials.
The reason these are so good is that they come with a thich piece of vinyl on the inside, which is designed to block sound, but also with some padding on the outside to help absorb even more sound.
They come with grommets on the top to ake the installation easier, and then you simply need to use velcro to attach the rest of it to the wall around the window.
The only con is that these window panels will cover the entire window and prevent light from getting in, luckilly you can also buy transparent vinyl panels, but these aren’t as effective.
You can find out more about these window panels at tmsoundproofing.com.
Ok, the steps so far are the ones that I consider to be the most effective, and funny enough weatherstripping is the most effective and affordable one of all, but now I will list a couple other alterlatives which, while not as effective, are easier to get/install and more affordable than at least the previous two.
Install Acoustic Curtains
One quick note about soundproofing curtains; Don’t buy into the marketing.
Yes, they help reduce echo inside of the room and they may dampen outside noise ever so slightly, but they don’t soundproof. However, they will reduce outside noise to some extent which is why I’m listing them here.
Soundproofing curtains, or more accurately “acoustic” curtains, have the advantage of being extremely affordable; about $30-$50 for a pair, and if you already weatherstripped your windows, adding an additional barrier like a thick curtain will further enhance the reduction in noise.
One other pro is that they help you dress up the room. So, if you’re thinking about getting new curtains, it won’t hurt to get acoustic curtains, which are essentially thicker than regular ones.
I wrote an entire article regarding acoustic curtains and if they actually work, which you can check out here.
Otherwise, these are the ones I’d recommend.
And if none of this is enough, you only have one more alternative…
Upgrade your Windows
I know, I know!!! Replacing the entire window with a double- or even triple-pane window will cost a fortune, but in some cases (very few actually), it might be worth doing.
If you’re building a new house, then by all means, install double-pane windows and be done with it.
However, replacing your old windows with new ones can be very costly since you also need to hire an expert to install them properly.
Yes it will work, but I would recommend it only as a last resort.
Mistakes to avoid
I have found many online resources that tell you to install acoustic panels when trying to soundproof, use carpetting, and all other sorts of things that actually improve the sound absorption, but don’t keep any of that sound out.
In fact, if you fill a room with rockwool, which is the go-to material today for building acoustic panels, and you play a sound inside of that room, when you compare the volume of that same sound outside of the room with- and without the rockwool, the difference is only about 6dB, which isn’t that much.
Soundproofing is all about blocking sound, not absorpbing it. Sure, absorption will still help, but only a little.
Essentially, don’t fill your room with acoustic panels, curtains, rugs, etc. since these won’t do that much.
Sure, curtains will dampen outside noise, but just a little.
Weatherstripp the windows, use caulk to seal every single gap and crack you can find, then install curtains and if that isn’t enough install window inserts of the soundproof window panels I mentioned.
Now, let’s see how to soundproof windows that slide up & down:
How to soundproof Windows that slide Up and Down

Most steps I mentioned earlier apply here, the only real difference lies in how you would install the weatherstrip and what kind to use, and this is what I will cover now.
The biggest differences are that you may not be able to use the Pile weatherstrip and will have to use a very thin foam weatherstrip, and that you will also have to install the same foam weatherstrip on the bottom of the window that closes downwards, and on the top of the window that closes upwards (if it’s not a static panel).
Additionally, you will need a v-seal weatherstripp to be installed between the two window panels (where the top and bottom windows meet once closed).
Steps to soundproofing Sliding up & down windows:
- Measure the side of the bottom window panel and cut two strips of weatherstripping tape to those exact measurements.
- Push the window up as far as it can go.
- Clean the frame with rubbing alcohol.
- Peel off the adhesive backing of the weatherstripp but leave a couple cm of it on the tape to be pushed between the frame and the window.
- Adhere it to the frame. Remember the part where you didn’t remove the adhesive backing? Insert that part between the frame and the window.
- Do this on both sides.
- Cut additional tape to the exact measuments of the bottom of the window and install it.
- Push down the window until it closes and peel the leftover adhesive cover and adhere it to the frame.
- Lastly, install the v-seal weatherstrip on the back of the upper side of the bottom panel (it might be easier to do this if you push the panel up again a little)
The rest of the steps are identical to what I mentioned earlier; Use caulk to seal any gaps, if the weatherstripping wasn’t enough consider installing window inserts, soundproofinf window panels, as well as acoustic curtains.
Conclusion
Soundproofing sliding windows, or windows in general, isn’t that complicated nor that expensive, especially considering that caulking and weatherstripping are the two most important steps and they are also very affordable materials to get.
The thing about soundproofing is that if you leave any gap unsealed, no matter how small, the whole process will have been for nothing.
So, you either go all in, or you don’t do it at all!
I hope this information was useful
Have a wonderful day!
Last Updated on March 3, 2021 by Facundo