Whether you’re driving a regular van or a camper van, you know that they are generally very noisy vehicles.
Not only are vans noisy, they also have bad heat insulation which means that in the summer they feel like an oven, while during the winter you feel like you’re going to freeze in them.
Most of the materials used to soundproof them will also aid with the temperature insulation factor, which is a huge plus in my opinion.
There are many reasons to soundproof a van; whether you use one for work, or if you simply want to go on a trip with the classic VW campervan, it will be a much more pleasant ride if the noise level inside the van doesn’t become unbearable even at 20MPH.
I know that a lot of you, especially the ones who own something like the Classic VW Campervan, are going to be hesitant to do this.
But fear not, the van will still look exactly the same, drive exactly the same, but it will feel much better!
In this article I will show you exactly what you need to do, what materials you should purchase and how to install them in order to fully soundproof the van.
Table of Contents
Table of Contents
- The Three Ways to Stop Noise Transmission
- Materials you will need
- Soundproof the Floor
- Soundproof the Doors
- Soundproof the Roof
- Soundproof the Windows
- Reduce air-borne Noise in your Van
- What mistakes to avoid
- Conclusion
The Three Ways to Stop Noise Transmission
Before you start to soundproof the van, you should know that noise will be generated in a few different ways, which means that you won’t be using just one material and one method, but rather a couple, depending on how the sound is transmitted.
Stop panels from resonating
Usually the biggest culprit when it comes to van noises is the large and thin sheets of metal.
This is because they reverberate which will not only transmit the noises, but even amplify them, just like a gong would.
If you ever had a bus or a truck driving by your home, your windows may have started to shake, making a rattling noise.
If you put your hand on the window it absorbs those vibrations, getting rid of the noise.
This is exactly what happens with your van, but since you can’t put your hands on the van’s walls while driving, this is where sound deadening materials come in.
Block Sound
In order to block sound, you are going to want to use some thick and dense material like Mass Loaded Vinyl or Soundproofing Floor Mats which should reduce outside noises and road noise transmission.
Absorb air-borne noise
To absorb air-borne noise you will need to install some sound absorbing materials like acoustic foam, an auto carpet, or anything that can make the soundwaves die out faster.
Materials you will need
- Noico Sound Deadener Floor Mat
- Mass Loaded Vinyl; Either get the Noico Floor Mat or the Mass Loaded Vinyl, you won’t need both.
- SoundSkins Door Kit
- 6mm Closed Cell Foam
- Glue Spray Two cans should be enough; this depends if you plan on using the Floor mats or the Mass Loaded Vinyl.
- Wooden Roller
- Scissors
Soundproof the Floor
The floor is the most important surface to soundproof since all the vibrations generated from the road will be transferred directly to it.
Here you have two options;
- Install a Soundproofing Floor Mat like Dynamat, or my personal favorite which are the Noico ones.
- Install Mass Loaded Vinyl.
Right off the bat I must say that the Floor Mats are a better choice simply because they have an adhesive backing, meaning that you won’t need to use any glue spray, even though I still recommend that you do.
How to install them?
Whether you go for the Noico Mats or for the MLV, the steps you need to follow are exactly the same, the only difference is that you should use some Glue Spray to adhere the MLV.
First you should take out all the floor mats already in your van.
After you’ve done this make sure to thoroughly clean the van’s floors, over the wheel wells, etc. otherwise the adhesive won’t last as long.
Next, all you need to do is remove the adhesive backing on the Noico floor mats and install them.
These can be cut to make the installation easier and more precise.
The more surface you cover, the better.
I would highly recommend covering up the entirety of the van’s floor, from front to back.
Don’t forget to cover up the Wheel wells as well.
If you can manage to remove the seats in order to better apply the Floor Mats, do that as well!
Important: Use the wooden roller to firmly adhere the mats and the MLV, even on the Wheel wells.
Once done with the installation you can put the mats you took out in the beginning back in.
Note: Installing a carpet can help, not at blocking the sound, but rather at absorbing the soundwaves inside the van, making it die out quicker.

Soundproof the Doors
This is very easy to do, but requires a bit of time and effort since you need to remove any panels that cover up the door, since the goal here is to gain access to the inside of the door.
If there are any speakers inside the doors, make sure to remove them as well.
Since van doors are hollow, vibrations will have a very easy time creating reverberations on those thin sheets of metal.
Here you will need to install some materials to absorb those vibrations, but first…
Use Rubbing alcohol to clean every surface of the door to remove grease and oil.
Next you need to apply the insulation material.
My personal recommendation is this SoundSkins Pro Door Kit which will get you the best result possible.
How to apply the insulation foam to the car’s door?
The first step is to cut a couple of pieces into squares.
Next, remove the adhesive backing and adhere them to the inner side of the outer sheet of the door.
The more surface you cover, the more effective this will be, however, if you’re on a budget then you might want to consider adhering just a few pieces and spreading them out evenly.
You should cover at least 25% of the total surface.
This will reduce the vibrations significantly.
Now it’s time to work on the inner side of the door.
Here I would recommend just using one big piece of the material to insulate the inner side.
This is easier than having to cut lots of small pieces and adhering them to the door, plus it’s actually better because you’re not leaving small gaps between them where sound can get through.
Tip: Place some cardboard against the inner side of the door and using a pencil trace the whole surface you want to apply insulation to.
Make sure to leave room for any moving parts, such as the lock, and for the screw holes.
Next, cut the cardboard and use it to transfer the shape to the SoundSkins.
Once you cut it, remove the protective backing and adhere it to the door and you’re done.
Note: Again, use the wooden roller to firmly adhere the SoundSkins.
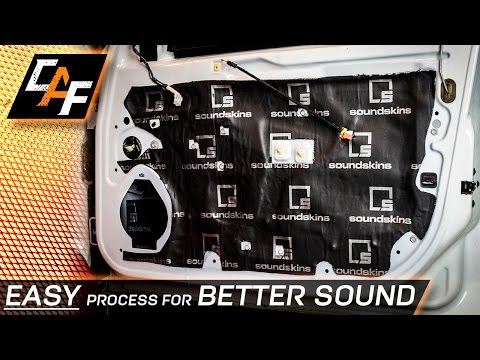
Here’s a video showing you how to do it.
Soundproof the Roof
Again, just like you did with the doors, you will need to adhere the SoundSkins to the Roof.
This is fairly easy to do, just cut it to the required size and adhere it.
It may be best to use many small pieces instead of a big one for easier installation.
Next, you are going to need to use the Vibro 6mm Closed Cell Foam and adhere it to the roof.
Simply measure the width of the roof and cut it.
Note: Since there are some lumps and bumps on the roof, cut it a bit wider than the actual width of the roof so it doesn’t come up short.
This closed cell foam also comes with an adhesive backing which means that the installation should be very fast and easy to do.
You might choose to cover it up after installing it, but I think that it looks kind of nice!
Soundproof the Windows
This is something that you are only going to want if you’re using the van for work purposes and when you don’t care too much about the window being “usable”.
Here you need to do two things;
First, using the same SoundSkins you used on the doors, cut them to the exact measurements of the window.
Remove the adhesive backing and firmly adhere them using the wooden roller.
Next, cut some of the Vibro 6mm Closed Cell Foam to fit the window panel and adhere it.
Reduce air-borne Noise in your Van
All of the steps described so far will reduce road noise and noise generated from vibrations that make the metal panels resonate, however, none of these materials really absorb sound.
What I mean by this is that soundwaves are free to bounce off every surface in the van without getting absorbed, which means that they won’t die out as fast, making the van not feel as quiet.
The simplest solution is to get some acoustic foam panels like these ones from Amazon.
These are the kind of acoustic foam panels used in many recording studios and the purpose of them is to absorb the sound as fast as possible, making it die out much more quickly.
You can install these on the roof and the walls using some Glue Spray.
What mistakes to avoid
- Don’t use Foil Bubble Wrap; Even though it’s very inexpensive and many people recommend it, it doesn’t do much for insulation, you’d be wasting your money.
- Don’t use fiberglass since it can be very toxic and hard to work with!
Conclusion
After reading this entire guide you might be thinking that soundproofing a van is a complicated process that takes a lot of time and money, but to be honest, if done properly, this shouldn’t take more than two hours and it’s also not much of an investment.
The most important part of the van to soundproof is definitely the floor. If you’re on a budget and don’t want to soundproof the entire van, start there.
If you can think of any other ways to soundproof a van that I didn’t mention, please leave a comment below on how to do it.
I hope you have a wonderful day!
Last Updated on March 3, 2021 by Facundo