Ser baterista es fantástico, ser vecino de uno es menos fantástico a menos que se implemente una insonorización adecuada.
En este artículo repasaré todos los pasos que debes seguir para insonorizar eficientemente tu sala de batería.
Entonces, ¡vamos directamente al tema!
Tabla de contenidos
¿Cómo insonorizar una habitación para Batería?
Para evitar que el sonido de una batería salga de la habitación, será necesario sellar todas las vías posibles por donde pueda salir, lo que significa insonorizar puertas, ventanas, paredes e instalar materiales que absorban el sonido y las vibraciones, como una alfombra. será requerido.
Ahora entraré en detalles y también te diré en qué debes priorizar la insonorización, empezando por la puerta:
Insonorizar la puerta
El primer y más importante lugar para empezar es la Puerta.
Si no está perfectamente sellado, el sonido definitivamente saldrá de la habitación. Una sola pequeña abertura en la puerta puede cambiar drásticamente la cantidad de ruido que se permite pasar.
Un buen consejo que puedes implementar es cerrar la puerta, lo mismo se puede aplicar a las ventanas y tener a alguien usa una linterna desde el otro lado en los bordes de la puerta.
De esta manera podrás saber si hay espacios entre la puerta y el marco. Si la luz brilla, debes sellar esa grieta.
Otra forma de hacerlo es sintiendo el flujo de aire. Si hay alguna parte de la puerta por la que puedes sentir que entra algo de aire, entonces el sonido también podrá hacerlo. ¡Asegúrate de sellar esas partes!
Pasos para insonorizar una puerta
Escribí una guía completa sobre Cómo insonorizar correctamente una puerta. que puede encontrar siguiendo este enlace y le recomiendo encarecidamente que lo lea para obtener más información, pero aquí hay un resumen rápido:
- Burlete de la puerta: La cinta burlete es, con diferencia, la mejor herramienta para crear un sello hermético entre la puerta y el marco.
- Utilice masilla acústica: Si bien no es tan importante, el sellador acústico puede ayudarlo a sellar cualquier espacio que se haya formado a lo largo de los años entre el marco y la pared.
- Instalar un barrido de puerta: Un barrido de puerta cubrirá el espacio que queda entre el piso y la puerta.
- Agregar masa a la puerta: Corta un trozo de aislamiento de Espuma Rígida del tamaño exacto de la puerta y clávalo a ella.
- Utilice mantas móviles: Las mantas para mudanzas son buenas para amortiguar el sonido y colgar una o dos de ellas en la puerta reducirá el nivel del sonido que entra.
Insonorizar las ventanas
El proceso de insonorizar las ventanas es casi idéntico al de las puertas, pero si quieres una guía completa de cómo hacerlo, aquí tienes mi guía sobre cómo insonorizar ventanas.
Nuevamente, aquí hay un resumen rápido sobre cómo insonorizar una ventana:
Pasos para insonorizar una ventana
- Utilice un burlete: Aquí se aplica el mismo concepto; coloque el burlete al marco y esto debería crear un sello hermético al cerrar la ventana.
- Utilice masilla acústica: Si hay un pequeño espacio entre el marco y la pared, lo que suele ocurrir en ventanas más antiguas, use masilla para sellarlos.
- Instalar un tapón de ventana: Los tapones para ventanas son trozos de espuma que son un poco más grandes que la ventana y se insertan en el marco para cubrirlo por completo.
- Instalar cortinas acústicas: Colgante cortinas acústicas de buena calidad absorberá parte del sonido.
- Utilice mantas móviles: Mismo concepto que antes; Las mantas para mudanzas son excelentes absorbentes de sonido.
Hay mucho más y si realmente desea insonorizar sus ventanas adecuadamente, consulte la publicación que vinculé anteriormente, pero siempre que coloque burletes en las ventanas y las cubra con un material realmente grueso, debería estar listo.
Instalar paneles de yeso
Si bien puede ser bastante costoso y llevar mucho tiempo agregar algunos paneles de yeso a las paredes existentes para agregar otra barrera por la que el sonido tendría que atravesar, podría ser la mejor manera de hacerlo en algunos casos.
Los paneles de yeso actuarán como una barrera adicional, y esto reduce drásticamente la cantidad de ruido que se permite salir de la habitación, y en lo que respecta a la insonorización, la mejor manera es instalar materiales que bloqueen el sonido en lugar de absorberlo, como lo harían los paneles acústicos. para hacerlo.
Una cosa adicional que podrías considerar hacer es agregar algunos compuesto de insonorización a la parte posterior del panel de yeso para bloquear aún más el sonido.
Estos son los mejores pasos a seguir ya que están diseñados para evitar que se salga el sonido.
La instalación de paneles acústicos de absorción de sonido puede ayudar, pero en realidad están diseñados para reducir la cantidad de sonido que puede rebotar DENTRO de la habitación, pero no para controlar cuánto debería poder salir.
Aún así, la absorción del sonido puede reducir la cantidad de sonido de la batería que puede salir, por lo que es posible que desees considerar agregarlo a la habitación.
Instalar materiales fonoabsorbentes en paredes y techo.
Cuando tienes superficies duras en una habitación y haces un ruido fuerte, como lo haría un tambor, estas ondas sonoras rebotan en todas las paredes, y este es el "eco", también conocido como reverberación, que escuchas cuando estás en un espacio vacío. habitación.
La forma más sencilla de evitarlo es comprando unos paneles acústicos sencillos que puedas colgar en las paredes y el techo.
¡Estos no son particularmente caros y, de hecho, pueden verse muy bien!
Hay dos diferentes que recomendaría; El Espuma de absorción acústica Auralex Acoustics, del cual necesitarás muchos, así que asegúrate de conseguir al menos un paquete de 24 piezas y algunas trampas de bajo como estas, lo que ayudará a controlar un poco mejor las frecuencias más bajas.
¡Por supuesto, cuanta más superficie puedas cubrir, mejor! Si cubres todas las paredes y el techo, definitivamente notarás una diferencia dramática.
La espuma acústica, como ya mencioné, no es la mejor manera de evitar que el sonido salga de la habitación; ayuda, pero no es la mejor manera.
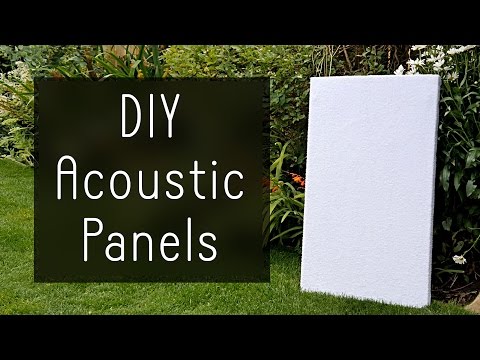
Paneles Acústicos DIY
Si no tiene el presupuesto para comprar todos los paneles de espuma acústica, puede construirlos usted mismo.
Aquí tienes un par de opciones, pero te recomiendo que las hagas usando toallas Rockwool.
Hice ambas cosas y tengo que decir que funcionan increíblemente bien, especialmente los que hice de lana de roca (enlace a la guía sobre cómo hacerlos).
Aquí tienes una guía sobre cómo hacer algunas usando toallas:
Todo lo que necesitarás son algunos trozos de madera para los marcos y muchas toallas viejas. Estos podrían terminar costando literalmente alrededor de $2 por cada uno y lo que es aún más sorprendente es que funcionan tan bien como los paneles de espuma acústica, si no mejor.
Encontré este fantástico video de DIY Perks en YouTube donde te enseña cómo hacerlos, así que asegúrate de verlo.
Alfombra de tambor
No se puede subestimar la importancia de una alfombra para batería. Hará mucho para absorber aún más los sonidos creados por la batería.
Aunque podrías usar una alfombra vieja que tengas por ahí, te recomiendo encarecidamente esta alfombra diseñada específicamente para este propósito ya que es asequible y de gran calidad.
Todas estas alfombras para batería deben usarse sobre un piso alfombrado, aunque no es el fin del mundo si las usas directamente sobre el piso. Sin embargo, si desea aprovecharlo al máximo, instale una alfombra o coloque otra alfombra debajo.
Las alfombras de batería están diseñadas de una manera específica que permite que las espuelas y el soporte no se resbalen ni se muevan durante sesiones largas.
Una alfombra no solo absorberá el sonido, sino, lo que es más importante, las vibraciones, que definitivamente pueden crear muchos ruidos no deseados por sí solas.
Escudos de tambor
Si hay una solución sencilla para el ruido del tambor, entonces tiene que ser un Drum Shield.
El único problema es que son realmente caros y, además, aún necesitarás aplicar algunos de los otros consejos de insonorización de esta lista para obtener los mejores resultados.
Si realmente necesita bajar el volumen de su batería, entonces debería obtener el Escudo de tambor DS4.
Si desea una solución rápida, entonces un protector de tambor sería su mejor opción; sin embargo, aunque evita que el sonido salga por el frente y los lados, no impedirá que suba.
Por eso es necesaria una insonorización adicional.
Desacoplamiento
Las vibraciones sonoras pueden transferirse fácilmente de una estructura a otra si están en contacto directo, lo que hace que el problema sea aún peor que antes.
Aquí es necesario encontrar una manera de bloquear esa transferencia de sonido/vibración aislando cada estructura con una goma antivibración.
Instalar cualquier tipo de goma antivibraciones será de gran ayuda en esto.
Un consejo sería conseguir una o dos alfombras gruesas y colocar debajo una alfombra antivibraciones. También puedes echar un vistazo al sorbotano, que es uno de los mejores materiales disponibles para reducir las vibraciones no deseadas.
Conclusión
Insonorizar una habitación para batería es algo que absolutamente debes hacer a menos que quieras volver locos a tu familia y vecinos.
¡Sigue todos estos pasos y tus sesiones de batería serán extremadamente silenciosas en poco tiempo!
Última actualización el 3 de marzo de 2021 por facundo