Trabajar desde casa es fantástico. No tener que desplazarme ni lidiar con el tráfico es algo que me encanta ahora que comencé a trabajar desde casa.
Sin embargo, trabajar desde casa significa que no estarás en un ambiente de trabajo típico donde los ruidos excesivos, como los que hacen tus hijos mientras juegan, no son un problema.
Por eso es tan importante insonorizar una oficina en casa, porque reducir las distracciones no deseadas significa que podrás trabajar de manera mucho más eficiente.
En este artículo repasaré cada uno de los pasos necesarios para insonorizar adecuadamente una oficina en casa, empezando por los que creo que serán más efectivos.
Tabla de contenidos
Cómo insonorizar una oficina en casa
Empiece por insonorizar puertas y ventanas mediante un burlete e instale un barrido de puertas, ya que por aquí es por donde pueden entrar la mayoría de los ruidos no deseados.
Esto debería solucionar el problema en 99% de los casos, pero también podría considerar instalar paneles de yeso para aislar las paredes, conseguir una alfombra gruesa y tratar acústicamente la habitación..
Insonorización versus absorción acústica
Insonorización es el proceso de aislar o bloquear el sonido, no permitiéndole entrar o salir de una habitación.
Para hacer esto, necesitarás usar materiales que estén diseñados para no dejar pasar el sonido, como vinilo cargado en masa, paneles de yeso, etc.
Absorción de sonido Se basa en materiales que absorben bien el sonido, como paneles acústicos, mantas acústicas, etc. para reducir el eco en el interior de una habitación.
La absorción del sonido, aunque no es excelente a la hora de insonorizar, seguirá siendo útil, por lo que es posible que desees utilizarla junto con materiales que bloqueen el sonido para lograr los mejores resultados.
Puedes aprender más sobre el diferencias entre insonorización y tratamiento acústico aquí.
Ahora, entremos en la guía.
1. Insonorizar la puerta
La insonorización se trata de sellar cada espacio o grieta por donde se pueda permitir que el sonido entre o salga, ya que no importa cuán pequeña sea la brecha, aún podrá pasar.
Insonorizar una puerta se puede hacer en unos 15 minutos y por muy poco dinero, y los resultados se notarán mucho.
Un consejo para comprobar si la puerta está correctamente sellada es hacer que alguien se pare al otro lado de la puerta (con la puerta cerrada) usando una linterna para iluminar todo el marco. Tú, desde el otro lado de la puerta, no deberías ver pasar ninguna luz si está sellada correctamente.
Si puedes ver ciertos puntos por donde entra la luz, trabaja en ellos hasta que estén sellados.
Pasos para insonorizar una puerta de Home Office;
- Burlete de la puerta: La cinta burlete es, con diferencia, la mejor herramienta para crear un sello hermético entre la puerta y el marco.
- Utilice masilla acústica: Si bien no es tan importante, el sellador acústico puede ayudarlo a sellar cualquier espacio que se haya formado a lo largo de los años entre el marco y la pared.
- Instalar un barrido de puerta: Un barrido de puertas cubrirá el espacio que queda abierto entre el piso y la puerta.
Si bien hacer estas cosas ya debería proporcionar una mejora drástica, si desea insonorizar la puerta aún más, entonces lee mi publicación sobre cómo insonorizar adecuadamente una puerta.
Nota IMPORTANTE: Si su oficina en casa tiene un Puerta corrediza, entonces la insonorización puede ser un poco diferente. Pero no te preocupes, ya que aquí tienes un guía sobre cómo insonorizarlos que lo llevará a través de todo el proceso paso a paso.
2. Insonorizar las ventanas
El vidrio no es particularmente conocido por sus capacidades de aislamiento, lo que significa que las ventanas son definitivamente un lugar en el que necesitarás trabajar para insonorizar tu oficina en casa, especialmente si están conectadas de alguna manera con el resto de la casa, lo cual no es así. normal pero lo he visto suceder. De hecho, la oficina de mi casa tiene una ventana que la conecta con la cocina.
El proceso de insonorizar las ventanas es casi idéntico al de las puertas, pero si quieres una guía completa de cómo hacerlo, aquí tienes mi guía sobre cómo insonorizar ventanas.
Pasos para insonorizar una ventana
- Utilice un burlete: El mismo concepto se aplica aquí; coloque el burlete al marco y esto debería crear un sello hermético al cerrar la ventana.
- Utilice masilla acústica: Si hay un pequeño espacio entre el marco y la pared, lo que suele ocurrir en ventanas más antiguas, use masilla para sellarlos.
- Instalar cortinas acústicas: Colgante cortinas acústicas de buena calidad absorberá parte del sonido.
- Utilice mantas móviles: Las mantas para mudanzas son excelentes absorbentes de sonido y son fáciles de instalar.
Hay mucho más y si realmente desea insonorizar sus ventanas adecuadamente, consulte la publicación que vinculé anteriormente, pero siempre que coloque burletes en las ventanas y las cubra con un material muy grueso, debe estar listo.
Las cortinas son, con diferencia, el mejor elemento para instalar en las ventanas, ya que cumplen tres propósitos; insonorización, tratamiento acústico, y realmente visten la estancia.
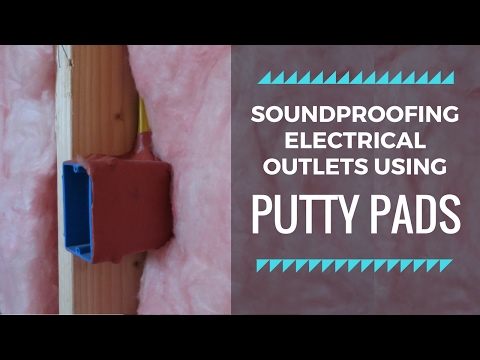
3. Insonorizar los enchufes eléctricos
Quizás se pregunte por qué menciono esto, ya que uno no pensaría inmediatamente que los enchufes son los culpables del aislamiento acústico deficiente, pero definitivamente pueden dejar entrar o salir ruidos y sin mucha dificultad.
La buena noticia es que son muy fáciles de aislar, ¡y además de forma asequible!
Pasos para insonorizar una toma de corriente
- Utilice un sello de salida: Estos sellos de goma van entre la placa y el cuadro eléctrico y evitarán tanto ruidos como corrientes de aire.
- Masilla Acústica: Masilla Acústica Se puede utilizar para insonorizar formas extrañas, como cajas eléctricas.
- Utilice masilla acústica: También puede utilizar masilla acústica entre la placa y la caja/pared eléctrica para crear un sello más adecuado.
Otra alternativa sería conseguir una tapa para tomacorriente resistente a la intemperie, pero esto podría interferir con la estética de la cocina.
4. Insonorizar las rejillas de ventilación
El problema con las salidas de aire es que no se pueden insonorizar completamente sin sellarlas por completo.
Hay un par de cosas que puedes hacer, sin embargo, ten en cuenta que las salidas de aire están diseñadas para mantener el aire entrando y saliendo de la habitación, lo que significa que obstruirlas reducirá el flujo de aire; Por ejemplo, aires acondicionados.
Pasos para insonorizar las rejillas de ventilación
- Cuelgue materiales que absorban el sonido frente a las rejillas de ventilación.
- Haz un laberinto que absorba el sonido dentro del respiradero.
- Construir un amortiguador de sonido
- sellar el respiradero
Cuelgue materiales absorbentes de sonido frente a la ventilación.
El uso de materiales que absorban el sonido, como mantas acústicas, y colgarlas frente al respiradero disminuirá la cantidad de ruido permitido en la oficina en casa.
Esta es la solución más sencilla y rápida, aunque todavía podrá pasar algo de sonido.
Construir un amortiguador de sonido
Este método puede ayudar un poco, pero llevará más tiempo que simplemente colgar mantas frente al respiradero.
Sólo necesitarás algunas piezas de madera contrachapada o tablero de fibra de densidad media, espuma acústica y algo de esfuerzo.
Debería verse así;

Haz un laberinto de sonidos dentro del respiradero
Este es un poco más complicado de lograr, pero funciona.
Al sonido le gusta viajar en línea recta, en cuanto construyes un laberinto con materiales que absorben el sonido, como espuma acústica, para que pueda recorrerlo antes de llegar a la oficina, el nivel de ruido que acaba entrando será drásticamente menor.
Debería verse así;

La combinación de este método y el anterior debería dar como resultado una reducción significativa del ruido.
Bloquee la ventilación por completo
Si no le importa en absoluto la ventilación y solo desea reducir completamente el ruido, entonces podría ser una buena idea simplemente bloquearla.
Aquí tienes dos opciones;
- Rellene el respiradero con material aislante del sonido y luego cúbralo con paneles de yeso.
- Utilizar esta Relleno Big Gap que puedes conseguir en Amazon y llenar el agujero con él. Se expandirá y será hermético y resistente al agua.
Una vez que hayas hecho esto, puedes lijarlo y pintar sobre él.
4. Insonorizar las paredes
Si las paredes están mal aisladas, tal vez porque cuando se construyó la casa no le prestaron demasiada atención, entonces es posible que tengas que hacer algo al respecto tú mismo.
Solo te recomendaría este paso si sabes lo que estás haciendo o si contratas a un profesional, pero debes saber que podría terminar costándote una fortuna.
Agregue una capa adicional de paneles de yeso
Si bien puede ser bastante costoso y llevar mucho tiempo agregar paneles de yeso a las paredes existentes para agregar otra barrera que el sonido tendría que atravesar, en algunos casos podría ser la mejor manera de abordar realmente el problema.
Drywall no solo actuará como una barrera adicional, sino que también evitará que las vibraciones se propaguen por las estructuras de su hogar, lo que significa que bloqueará los sonidos del aire y los ruidos estructurales.
Una cosa adicional que podrías considerar hacer es agregar esto compuesto de insonorización a la parte posterior del panel de yeso para bloquear aún más el sonido.
Nota: Utilice masilla acústica para sellar los espacios que quedan entre las láminas de paneles de yeso.
Instale vinilo cargado en masa con paneles de yeso
Antes de instalar el panel de yeso, si realmente desea llevar las cosas al siguiente nivel, primero debe instalar MLV en las paredes y luego el panel de yeso encima.
- Primero debes medir la superficie que deseas cubrir, asegurándote de que el MLV cubra la mayor cantidad posible.
- Luego corte el MLV a esas medidas exactas.
- Coloque la primera tira de MLV en la esquina superior de la pared asegurándose de que esté recta y fíjela con clavos, tornillos o una grapadora. Sea generoso con las grapas ya que son pesadas.
- Repita el proceso hasta cubrir toda la oficina central.
- Recorta agujeros para los enchufes eléctricos.
- Utilice masilla acústica entre cada una de las láminas de MLV, especialmente en las esquinas.
- Cuelga el Drywall y aplica el acabado deseado.
Te recomiendo que uses este vinilo cargado masivamente que puedes encontrar en Amazon.
Cubrir la pared con Mantas Acústicas
Las mantas acústicas, si bien absorben mejor el sonido que lo bloquean, proporcionarán una capa de aislamiento adicional a las paredes, y si cubres toda la pared problemática con ellas, deberías notar la diferencia.
Por supuesto, no será tan bueno como instalar paneles de yeso, pero ayudará.
5. Insonorizar el suelo
La mejor forma de reducir la transmisión de ruido es desacoplando las estructuras que están conectadas entre sí para que las vibraciones no puedan transmitirse a través de ellas.
Cuando se trata del suelo tienes un par de opciones;
- Instale tapetes entrelazados: Alfombras de piso Absorberá tus pisadas así como la fuerza de cualquier cosa que puedas dejar caer al suelo, absorbiendo por tanto también el ruido que esto pueda generar.
- Instalar un contrapiso para el piso: Cuando se instala debajo de un piso laminado, este contrapiso absorberá las vibraciones, pasos, etc. que de otro modo podrían causar ruido.
- Instalar acolchado de alfombra: Rellenos de alfombras Absorberán cualquier ruido o vibración y generalmente se instalan debajo de alfombras.
- Instalar una alfombra gruesa: Instalar una alfombra gruesa debajo de tu silla, o en puntos estratégicos de la oficina en casa, te ayudará a absorber algunos ruidos (principalmente pasos y algo de ruido aéreo).
En la mayoría de los casos, recomendaría adquirir una alfombra gruesa o instalar tapetes entrelazados. Las otras dos recomendaciones funcionan bien, pero requieren más trabajo y, a menudo, también son más caras.
6. Considere la posibilidad de tratar acústicamente el Ministerio del Interior
La absorción del sonido no es tan buena para bloquear los ruidos exteriores, o en otras palabras; Los ruidos externos seguirán llegando incluso si llena la oficina de su hogar con paneles de espuma acústica.
Sin embargo, la absorción del sonido hará que todas las ondas sonoras de la habitación se extingan más rápido, haciéndola sentir más silenciosa.
Esto es especialmente útil si necesitas grabar audio, ya que hará que suene mucho más profesional.
Aquí hay algunas cosas básicas que puede hacer;
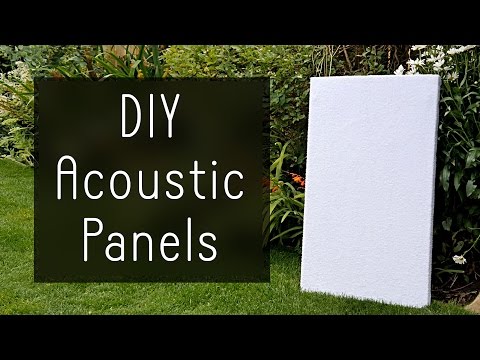
Compra paneles acústicos o hazlos tú mismo
puedes comprar paneles acústicos en Amazon (enlace de afiliado) que ayudará a reducir el eco en la habitación.
Es cierto que la mayoría de ellos no se ven muy bien, especialmente los de espuma baratos, pero ayudarán.
Lo que te recomendaría es hacerlos tú mismo, ya que terminarán siendo más efectivos y económicos, además puedes darles el aspecto que quieras para que sirvan como parte de la decoración.
Hice paneles acústicos para el estudio de mi casa con lana de roca y luego también intenté hacer un par más con toallas, y ambos funcionan sorprendentemente bien, mucho mejor que los paneles de espuma normales.
Aquí está un guía sobre cómo hacer paneles acústicos de lana de roca para $15 cada uno, o puedes ver este video donde aprenderás cómo hacerlos usando toallas.
Utilice pinturas para la absorción del sonido
Si tienes cuadros que no tienen vidrio delante, o si estás dispuesto a quitarlo, puedes seguir las mismas ideas expuestas en el video que acabo de vincular y llenarlos con toallas, creando "acústicos". pinturas”, de algún tipo.
¡De esta manera, podrás decorar la habitación con tus cuadros favoritos y hacer que también sean funcionales!
Considere cortinas y mantas acústicas
Ya mencioné ambos elementos anteriormente, y si estás tratando de reducir el eco en una habitación, instalar un par de cortinas insonorizadas, o cortinas normales que sean gruesas y pesadas, ayudará a absorber esas ondas sonoras.
Las mantas acústicas pueden funcionar igual de bien, pero no quedan tan bien, por eso me quedaría con las cortinas.
Consigue la alfombra más gruesa que puedas encontrar
Lo mencioné hace un segundo, pero las alfombras, especialmente las súper gruesas, ayudarán a absorber muchos de los ruidos generados dentro de tu oficina.
Consigue un sofá y cojines.
Básicamente, los sofás funcionan como un enorme panel acústico que se encuentra justo en el medio de la habitación, y conseguir un par de cojines para el sofá no sólo ayudará con la decoración de la habitación, sino también a absorber aún más sonido.
Por supuesto, no todo el mundo necesita un sofá enorme en su sala de estar, o puede que no tenga espacio, pero puede ayudar.
Conclusión
Trabajo desde casa escribiendo artículos y grabando música, lo que significa que necesito una habitación con tratamiento acústico e insonorizada.
Por suerte, la habitación que elegí para mi oficina en casa ya era muy silenciosa, así que sólo tuve que insonorizar la puerta y la ventana con un burlete.
Pero decidí hacer nueve enormes paneles acústicos hechos de lana de roca, además de hacer un pequeño sofá, y esto cambió la habitación por completo.
Insonorizar y tratar la acústica de tu oficina en casa no tiene por qué ser demasiado complicado, y en la mayoría de situaciones sólo tendrás que ocuparte de las puertas y ventanas, ¡y listo! Y esto te costará como $20.
Espero que esta información haya sido útil!
¡Ten un día maravilloso!
Última actualización el 11 de mayo de 2022 por facundo